Affiliate Disclosure: This post contains affiliate links. If you purchase through these links, Survival Place Blog may earn a commission at no additional cost to you. As an Amazon Associate I earn from qualifying purchases.
Knowing what to do in a wilderness emergency is important. Being able to perform those skills when you need them is something entirely different.
You can read about using a compass, filtering drinking water, building an emergency shelter, or signaling for rescue. But until you’ve actually practiced those activities, you may not know how well you understand them—or how your equipment performs outside.
That’s why developing basic wilderness survival skills should involve more than reading instructions or watching demonstrations.
Practical exercises help turn survival knowledge into familiar actions. They also reveal small mistakes, missing supplies, and equipment problems before those issues become serious in an emergency.
Fortunately, you don’t need to become stranded in the wilderness to begin learning.
Many foundational survival skills can be practiced in a backyard, local park, established campground, or other controlled outdoor environment. The goal is to learn gradually, work within your abilities, and develop confidence through repetition.
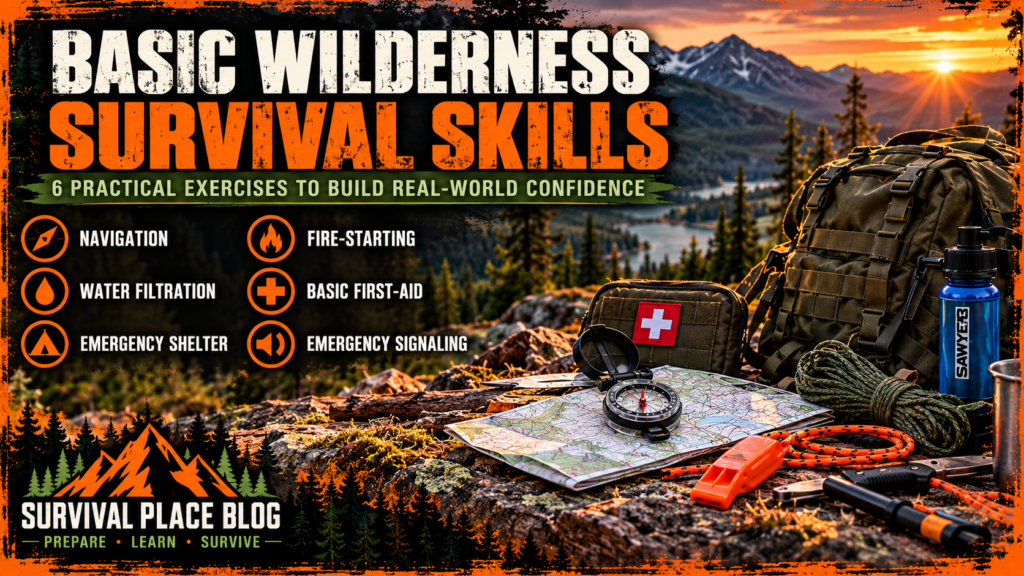
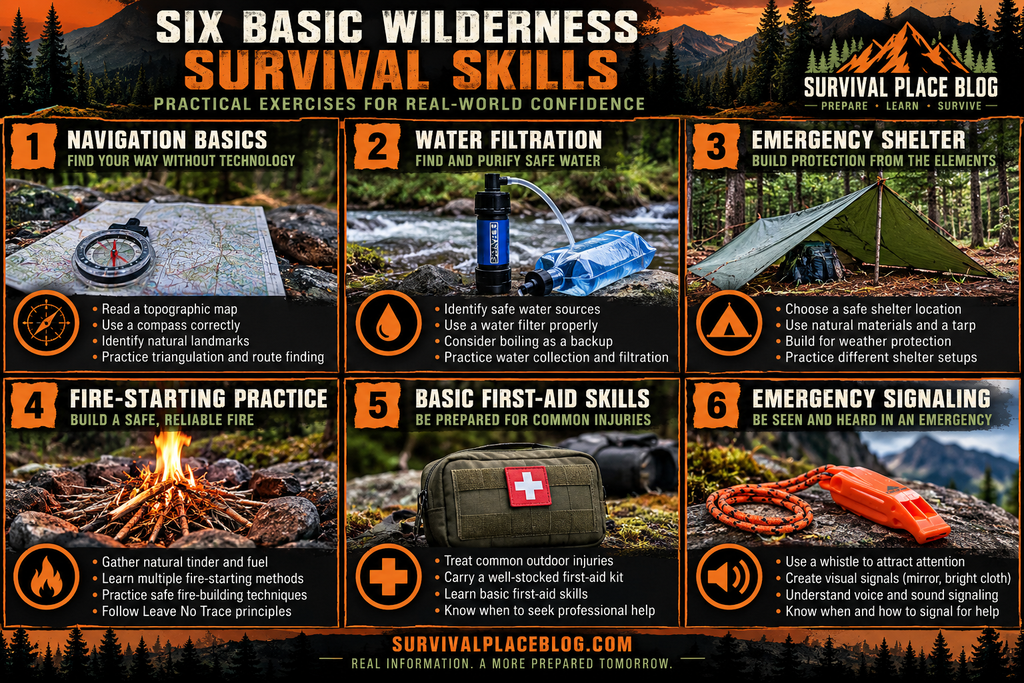
In this guide, we’ll cover six practical wilderness survival exercises for beginners:
- Navigation with a map and compass.
- Portable water filtration and treatment awareness.
- Emergency shelter setup.
- Safe fire-starting preparation.
- Basic wilderness first-aid response.
- Emergency signaling and rescue communication.
Each exercise includes the equipment you’ll need, a step-by-step practice activity, important safety considerations, and a simple way to measure your progress.
These exercises are starting points, not substitutes for professional instruction or the more comprehensive survival guides linked throughout this article.
1. Before You Begin: Choose a Safe Practice Location
One of the biggest mistakes beginners make is assuming survival practice must take place in remote or challenging terrain.
It doesn’t.
In fact, a familiar environment is often the best place to begin.
Your first objective is to learn how to use your equipment correctly—not to test how much discomfort or uncertainty you can tolerate.
Good Places to Practice
Depending on the exercise, suitable locations may include:
- Your backyard.
- A nearby public park where the activity is permitted.
- An established campground.
- A familiar, maintained walking trail.
- An outdoor education facility.
- A designated fire-training or recreational fire area where permitted.
Choose locations with reliable access, predictable conditions, and a straightforward way to stop the exercise.
For beginners, it can also be helpful to practice with a responsible partner.
Establish Basic Safety Rules
Before starting any exercise:
- Check the weather forecast.
- Tell someone where you’ll be and when you expect to return.
- Carry appropriate drinking water and personal supplies.
- Keep a charged phone available where coverage exists.
- Know how to contact emergency services.
- Stay within your physical abilities and experience level.
- Follow property rules, fire restrictions, and local regulations.
- Avoid unnecessary exposure to hazardous terrain, water, or weather.
The National Park Service recommends carrying essential outdoor equipment, including navigation tools, illumination, first-aid supplies, and emergency shelter appropriate to the trip.
Match the Exercise to Your Experience
Start with the simplest version of each activity.
For example, a beginner navigation exercise might involve following a short route through a familiar park. Later, you can introduce more complicated terrain under appropriate supervision.
Likewise, shelter practice can begin with a tarp in your backyard rather than an improvised overnight shelter in remote country.
The goal is controlled repetition, not unnecessary risk.
2. Exercise One: Practice Navigation With a Map and Compass
Navigation is one of the most useful basic wilderness survival skills you can develop.
Electronic navigation tools are convenient, but batteries can fail, devices can be damaged, and reception may be unreliable in some locations.
Understanding how to use a map, compass, and visible landmarks gives you another way to maintain awareness of your surroundings.
Exercise Objective
Follow a short, familiar route using a map and compass, identify several landmarks, and return to your starting point without becoming disoriented.
Equipment Needed
- Printed map of the practice area.
- Basic outdoor compass.
- Pencil and small notebook.
- Appropriate walking shoes.
- Charged phone for backup navigation and communication.
- Water and weather-appropriate clothing.
The TurnOnSport Orienteering Compass is a practical baseplate-style option for beginners learning to orient a map, identify directions, and follow a familiar route.
Step-by-Step Navigation Practice
Step 1: Study the map before walking.
Find your starting point and identify obvious features such as trails, roads, streams, buildings, and intersections.
Pay attention to the map legend and scale.
Step 2: Orient your map.
Hold the compass level and away from metal objects or electronics that may affect the needle.
Use the compass to orient the map toward magnetic north, accounting for local magnetic declination when appropriate.
Step 3: Identify three landmarks.
Choose visible, recognizable features along your intended route.
These might include a trail junction, bridge, distinctive hill, or building.
Step 4: Follow a short route.
Walk a familiar path while periodically checking your map.
Notice how landmarks appear as you approach them.
Step 5: Stop and identify your location.
At a safe point, pause and use your surroundings to estimate where you are on the map.
Compare nearby features with the printed information.
Step 6: Return to your starting point.
Retrace your route using the map and landmarks.
Keep your electronic navigation backup available throughout the exercise.
Safety Considerations
Do not deliberately leave established trails or enter unfamiliar terrain to make the exercise more challenging.
Avoid practicing near cliffs, steep drop-offs, dangerous crossings, or other hazards.
If you become uncertain about your location, stop and use your backup navigation method rather than continuing in an unknown direction.
Completion Check
You should be able to:
- Identify your starting location on the map.
- Orient the map using your compass.
- Recognize at least three landmarks.
- Follow the planned route.
- Return safely without guessing.
Learn More About Wilderness Navigation
This exercise introduces basic map and compass familiarity, but navigation involves additional skills such as understanding terrain features, estimating distance, using bearings, and recognizing natural navigation clues.
For a more complete explanation, read our guide, Wilderness Navigation: How to Navigate Without GPS.
3. Exercise Two: Practice Using a Portable Water Filter
Water is essential for survival, but finding water outdoors doesn’t automatically mean it’s safe to drink.
Clear-looking streams, lakes, and springs can contain microorganisms capable of causing illness.
A portable water filter can be useful, but beginners need to understand how their particular equipment works and what it does—and does not—remove.
Exercise Objective
Learn to assemble, operate, clean, and store a portable water filter while understanding when additional water treatment may be necessary.
Equipment Needed
- Portable camping or backpacking water filter.
- Clean container for collecting practice water.
- Separate clean receiving container.
- Manufacturer’s instructions.
- Clean water for initial practice.
- Any required cleaning or backflushing accessories.
The Sawyer Mini Water Filter is one compact filtration option commonly used for outdoor recreation.
Step-by-Step Water Filtration Practice
Step 1: Read the manufacturer’s instructions.
Before using the filter, identify the inlet, outlet, and any included accessories.
Check the manufacturer’s instructions for initial preparation, operation, cleaning, and storage.
Step 2: Assemble the equipment.
Connect the filter to the appropriate bottle, pouch, or other compatible system.
Make sure connections are secure.
Step 3: Practice with clean tap water.
For your first exercise, use clean tap water rather than untreated stream or pond water.
This allows you to become familiar with the equipment without creating an unnecessary exposure risk.
Step 4: Operate the filter.
Move water through the filter according to the manufacturer’s instructions.
Pay attention to the effort required and the flow rate.
Step 5: Prevent cross-contamination.
Keep the untreated-water side of the equipment separate from the clean-water outlet and receiving container.
Practice handling the equipment without allowing water from the untreated side to contact clean surfaces.
Step 6: Practice cleaning and maintenance.
Follow the manufacturer’s procedure for backflushing or cleaning, if applicable.
Learn how to recognize reduced flow and when a filter needs attention.
Step 7: Review storage requirements.
Some filters can be damaged by freezing after they have been used.
Check your specific model’s instructions for freezing, drying, storage, and replacement.
Understand Filtration Limitations
Not all portable water filters remove the same contaminants.
Many common backpacking microfilters are designed to reduce bacteria and protozoa but do not reliably remove viruses.
Most basic backpacking filters also do not make chemically contaminated water safe.
Depending on the water source, filter type, and contamination risks, additional treatment may be required.
The Centers for Disease Control and Prevention provides guidance on selecting water treatment methods for hiking, camping, and travel.
Important Safety Rule
Do not drink untreated natural water as part of this exercise.
Practice with clean water first.
When treating water from an actual outdoor source, use a method appropriate for the likely contaminants and follow reliable public-health guidance.
Avoid sources suspected of chemical pollution, fuel contamination, agricultural runoff, or harmful algal blooms. Ordinary boiling and basic backpacking filtration cannot reliably address every such hazard.
Completion Check
You should be able to:
- Assemble the filter correctly.
- Identify the untreated and treated water sides.
- Operate the equipment without cross-contamination.
- Explain the filter’s limitations.
- Perform the recommended cleaning procedure.
- Store the equipment appropriately.
Learn More About Wilderness Water Safety
Water treatment is more complicated than simply carrying a filter.
For detailed information on locating water, choosing treatment methods, and understanding contamination risks, read Wilderness Water: How to Find, Filter and Purify Water Safely.
4. Exercise Three: Set Up a Basic Emergency Shelter
Exposure to wind, rain, cold, and other environmental conditions can become dangerous when you’re unprepared.
Knowing how to create temporary protection is an important wilderness survival skill.
Fortunately, you can practice emergency shelter setup without spending the night in difficult conditions.
Exercise Objective
Set up a simple tarp or emergency bivy shelter, evaluate the surrounding conditions, and understand how shelter placement and ground insulation affect protection.
Equipment Needed
- Camping tarp or emergency bivy.
- Appropriate cordage.
- Tent stakes where permitted.
- Suitable anchor points.
- Sleeping pad or other appropriate ground insulation.
- Gloves, if needed.
The FREE SOLDIER Waterproof Camping Tarp Shelter Awning is a practical option for beginners learning to set up an A-frame or lean-to shelter. Its included stakes and guy lines make it useful for practicing different shelter configurations.
Step-by-Step Shelter Practice
Step 1: Evaluate the location.
Look for reasonably level ground with adequate drainage.
Avoid low areas where water may collect.
Check overhead for dead branches and other falling-object hazards.
Step 2: Observe the wind direction.
Notice which direction the wind is coming from.
Think about how your shelter could reduce direct exposure without trapping unsafe heat or blocking necessary ventilation.
Step 3: Choose a simple configuration.
For a beginner exercise, practice a basic A-frame or lean-to tarp arrangement using suitable supports.
Do not damage trees or vegetation when selecting anchor points.
Step 4: Set up the tarp.
Attach the cordage, secure the tarp, and adjust the tension.
Make sure stakes and guy lines are visible enough to avoid creating tripping hazards.
Step 5: Check the shelter from inside.
Sit or lie beneath the shelter and evaluate:
- Available space.
- Wind exposure.
- Ground moisture.
- Drainage.
- Ease of entering and exiting.
- Stability of the setup.
Step 6: Add ground insulation.
Place a sleeping pad beneath you.
Notice the difference between sitting directly on the ground and using an insulating layer.
Step 7: Break down and repeat.
Disassemble the shelter and set it up again.
Try to improve your organization and reduce unnecessary steps.
Practice Without Creating an Emergency
You don’t need to spend a cold, wet night under a tarp to learn how to pitch it.
Practice in safe weather first.
If you later progress to more demanding shelter exercises, do so with appropriate equipment, supervision, and a reliable backup shelter.
Completion Check
You should be able to:
- Identify a reasonably safe shelter location.
- Explain why drainage and overhead hazards matter.
- Set up a stable temporary shelter.
- Use suitable ground insulation.
- Break down and repack the equipment.
Learn More About Emergency Shelters
A practice tarp is only one type of temporary shelter.
For a broader explanation of shelter selection, exposure protection, and emergency shelter decisions, see Emergency Outdoor Shelter: How to Choose, Build, and Survive the Night.
5. Exercise Four: Practice Fire-Starting Preparation and Safety
Fire can provide warmth, light, and a means of heating water when conditions and regulations allow.
However, fire also introduces serious risks.
Wildfires, burns, carbon monoxide exposure, and damage to natural areas can result from careless fire use.
For beginners, safe fire-starting practice should focus first on preparation, understanding materials, and knowing when not to light a fire.
Exercise Objective
Identify suitable tinder and kindling, organize a basic fire lay, understand permitted ignition methods, and practice safe extinguishing procedures.
Equipment Needed
- Approved fire-starting equipment.
- Suitable tinder and kindling.
- Designated fire ring or other legally permitted fire area, if ignition is allowed.
- Water for extinguishing.
- Shovel or other appropriate fire-management tool.
- Gloves.
- Local fire restriction information.
Important: A live fire is optional. The entire preparation exercise can be completed without ignition.
Step-by-Step Fire Practice
Step 1: Check restrictions and conditions.
Before considering ignition, confirm that fires are allowed at your location.
Review local restrictions, wind conditions, and any fire danger warnings.
If conditions are unsafe or fires are prohibited, complete the exercise without lighting anything.
Step 2: Identify tinder and kindling.
Learn the difference between:
- Tinder: Fine, readily ignited material.
- Kindling: Small pieces of combustible material used to develop a small flame.
- Larger fuel: Wood added only after a stable fire has developed.
Use legally obtained, appropriate materials.
Avoid burning treated lumber, plastics, trash, or unknown substances.
Step 3: Organize a small fire lay.
Arrange a modest quantity of tinder and kindling in an approved fire area without lighting it.
Practice leaving sufficient space for airflow.
Step 4: Review ignition equipment.
Become familiar with the safe handling and storage of your fire-starting tools.
Do not use gasoline or other volatile liquid accelerants.
Step 5: Practice ignition only if permitted and appropriate.
If you’re using an approved fire area and conditions are safe, a responsible adult with suitable knowledge can supervise a small, controlled fire.
Keep water available and never leave the fire unattended.
If you’re inexperienced, consider taking a supervised outdoor-skills class before attempting live-fire practice.
Step 6: Practice complete extinguishing.
Extinguish a permitted fire with water, stir the ashes carefully, and repeat as necessary until everything is completely cool.
Never leave hot coals or embers behind.
Non-Flame Alternatives
When fires are prohibited or conditions are unsafe, practice:
- Identifying tinder and kindling.
- Building an unlit fire lay.
- Organizing fire-starting supplies.
- Reviewing local fire restrictions.
- Practicing safe equipment storage.
- Planning alternative lighting and warmth strategies.
Battery-powered lighting, appropriate clothing, adequate shelter, and insulated sleeping equipment can reduce dependence on an open fire.
Fire Safety Matters More Than Ignition Speed
A person who knows when not to start a fire is demonstrating an important survival skill.
The National Park Service provides guidance on preventing wildfires and practicing responsible fire safety in outdoor areas.
Completion Check
You should be able to:
- Distinguish tinder from kindling.
- Explain when a fire should not be started.
- Organize a small, unlit fire lay.
- Identify safe ignition and extinguishing principles.
- Explain why unattended or incompletely extinguished fires are dangerous.
Learn More About Wilderness Fire Starting
Fire-starting methods, material selection, and fire management deserve more attention than a single beginner exercise can provide.
For additional instruction, read Wilderness Fire Starting: Methods, Tinder and Fire Safety.
6. Exercise Five: Practice a Basic Wilderness First-Aid Scenario
When someone becomes injured outdoors, the first few decisions can be especially important.
You may need to recognize hazards, assess the situation, call for assistance, and provide appropriate basic care while waiting for professional help.
A controlled first-aid scenario is a useful way to practice these priorities.
Exercise Objective
Respond to a simulated minor injury by checking scene safety, communicating with the injured person, locating first-aid supplies, and explaining when emergency assistance is necessary.
Equipment Needed
- Basic first-aid kit.
- Phone or other available communication device.
- Notebook.
- A willing adult practice partner.
- Optional printed emergency response checklist.
The EVERLIT 250 Pcs Survival First Aid Kit is an option for beginners organizing their outdoor emergency supplies. It combines basic first-aid materials with additional survival equipment in a portable carrying pouch. Review the contents before heading outdoors and supplement the kit based on your needs and training.
Step-by-Step First-Aid Scenario
Imagine your hiking partner has stumbled on a maintained trail and reports pain in an ankle.
For this exercise, the injury is entirely simulated.
Step 1: Check for hazards.
Before approaching, look for immediate dangers such as unstable terrain, traffic, falling objects, or other hazards.
Do not put yourself in danger while attempting to help.
Step 2: Check responsiveness.
Speak to your partner.
Ask what happened and how they feel.
For a real emergency, call 911 or the applicable emergency number promptly when there are signs of serious injury, altered responsiveness, breathing problems, uncontrolled bleeding, or another urgent condition.
Step 3: Practice communicating clearly.
Ask your partner to describe the simulated injury.
Practice calmly explaining what you’re doing.
Do not move someone with a suspected serious injury unless necessary to escape immediate danger.
Step 4: Locate your first-aid supplies.
Open your kit and identify:
- Disposable gloves.
- Sterile dressings.
- Adhesive bandages.
- Gauze.
- Appropriate bandaging materials.
- Any other supplies included in your kit.
Do not perform invasive procedures or apply unnecessary treatments to your practice partner.
Step 5: Review emergency communication.
Practice explaining:
- Your approximate location.
- What happened.
- The number of people involved.
- The condition of the injured person.
- Whether immediate hazards are present.
For a simulated exercise, do not place a real emergency call.
Step 6: Discuss what happens next.
Would the person need help walking?
Should you remain in place?
Is professional assistance necessary?
Discuss the decision without trying to reproduce advanced medical procedures.
Learn From Recognized First-Aid Guidance
The American Red Cross provides first-aid education covering scene safety, emergency response, and basic care principles.
A formal first-aid and CPR course is strongly recommended for anyone planning regular outdoor activities.
Completion Check
You should be able to:
- Identify immediate scene hazards.
- Check whether a person is responsive.
- Recognize when emergency help is needed.
- Locate basic supplies in your first-aid kit.
- Communicate the situation clearly.
- Explain why advanced procedures require proper training.
Learn More About Wilderness First Aid
Outdoor emergencies can involve delayed rescue, difficult terrain, environmental exposure, and limited supplies.
For a more comprehensive introduction, read Wilderness First Aid: Essential Skills for Outdoor Emergencies.
7. Exercise Six: Practice Emergency Signaling and Rescue Communication
When someone becomes lost or injured outdoors, being able to attract attention and communicate a location can make a significant difference.
Emergency signaling is not just about carrying a whistle.
It involves knowing when to signal, choosing an effective method, and making yourself easier to locate.
Exercise Objective
Practice using an emergency whistle, identifying visible signaling options, and sharing an accurate location using available technology.
Equipment Needed
- Emergency whistle.
- Brightly colored fabric or other visible signaling material.
- Printed map.
- Charged phone with location services available.
- Notebook.
- Optional signaling mirror for supervised practice.
The LuxoGear Emergency Whistles with Lanyard (2-Pack) are a practical option for outdoor emergency signaling. Their bright orange color makes them easy to identify, while the included lanyards allow you to keep a whistle accessible on your outdoor equipment.
Step-by-Step Emergency Signaling Practice
Step 1: Inspect your whistle.
Make sure the whistle is clean, accessible, and functioning.
Attach it somewhere you can reach quickly.
Step 2: Practice an audible distress signal.
In an appropriate location where the sound won’t cause unnecessary alarm, practice three short whistle blasts.
Three blasts are a commonly taught distress pattern in outdoor settings, although signaling conventions can vary.
Do not conduct the exercise where bystanders could reasonably mistake it for a genuine emergency.
Step 3: Identify visible signaling options.
Look for ways to make your position easier to see.
Examples include:
- Brightly colored clothing.
- A high-contrast tarp or fabric panel.
- A flashlight used appropriately after dark.
- A signaling mirror used carefully to avoid shining into drivers’ or pilots’ eyes.
Do not create signal fires or smoke as part of this beginner exercise.
Step 4: Practice describing your location.
Use your map to identify your approximate position.
Look for nearby landmarks, trail names, road intersections, or other recognizable features.
Step 5: Practice sharing a digital location.
If your phone supports it, learn how to view coordinates and share your location with a trusted contact.
Understand that GPS positioning and the ability to transmit a message are separate capabilities.
A phone may determine a location even when cellular service is unavailable, but transmitting that location may require connectivity or supported satellite messaging.
Step 6: Review a lost-person response.
Imagine you have become separated from your group.
Instead of wandering without a plan, consider how you would:
- Stop and assess your surroundings.
- Check for immediate hazards.
- Determine whether you can safely identify your location.
- Contact emergency services when necessary.
- Use signaling equipment.
- Protect yourself from environmental exposure.
- Make your position easier for rescuers to locate.
If you’re genuinely lost, avoid unnecessary movement into unfamiliar or hazardous terrain. Follow the instructions of emergency responders if contact is established.
Completion Check
You should be able to:
- Locate and use your whistle.
- Explain a commonly used audible distress pattern.
- Identify at least two visible signaling methods.
- Describe your location using a map or landmarks.
- Find and share digital coordinates when your equipment supports it.
- Explain when to contact emergency services.
Learn More About Getting Lost and Rescued
Emergency signaling is one part of a much larger survival situation.
Knowing how to respond when you lose your bearings, protect yourself from exposure, and improve your chances of being found is equally important.
For a more complete explanation, read Lost in the Woods? How to Survive and Get Rescued.
8. Common Mistakes Beginners Make During Survival Practice
Practicing survival skills is valuable, but certain habits can make learning less effective—or introduce unnecessary risks.
Trying Too Much Too Soon
Beginners sometimes attempt complicated scenarios before learning the basics.
Start with manageable activities.
A successful short navigation exercise is more useful than becoming disoriented on an unfamiliar trail.
Relying Entirely on Equipment
Buying a compass, filter, tarp, or first-aid kit doesn’t mean you know how to use it.
Practice with the equipment you actually plan to carry.
Ignoring Manufacturer Instructions
Filters, shelters, lighting equipment, and other outdoor products have specific operating limitations.
Read the instructions and learn the correct maintenance procedures.
Practicing in Unsafe Conditions
Avoid severe weather, hazardous terrain, unsafe fire conditions, and unnecessary exposure.
Training should reduce your risk, not create an emergency.
Failing to Review Mistakes
If something doesn’t work, write it down.
An equipment problem discovered during a controlled exercise is an opportunity to improve your preparation.
Confusing Practice With Professional Training
Basic exercises cannot replace certified first-aid instruction, advanced navigation training, or supervised outdoor education.
Know when additional instruction is necessary.
9. Track Your Wilderness Survival Skill Development
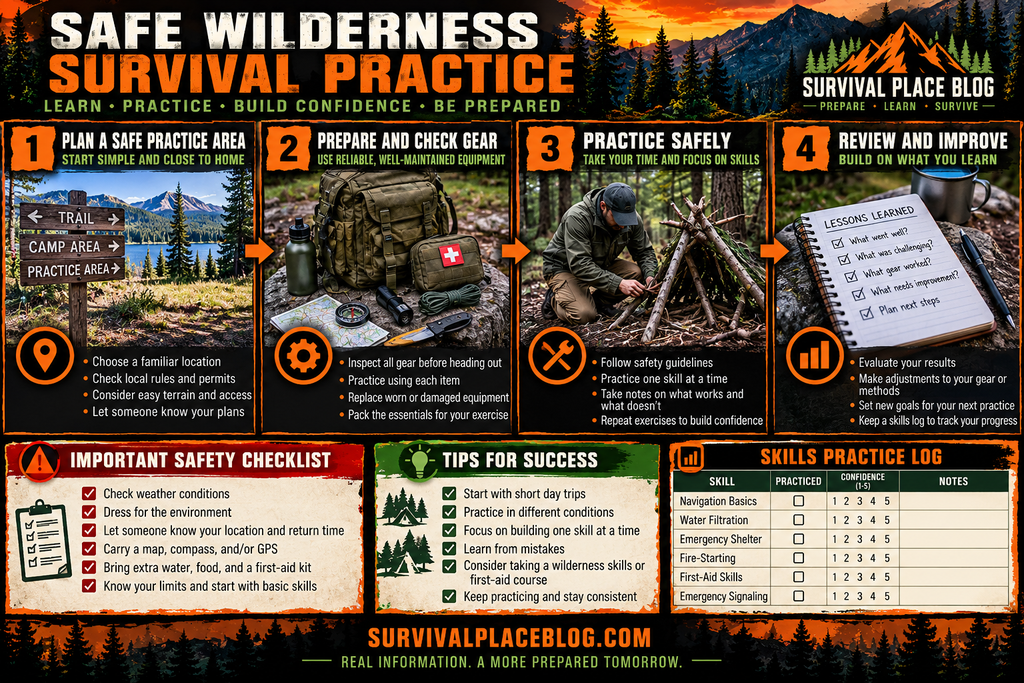
One of the easiest ways to improve is to maintain a simple practice record.
You don’t need a complicated system.
A notebook or digital document can help you remember what you’ve practiced and what still needs improvement.
Beginner Survival Skills Practice Tracker
| Skill | Practice Goal | Completed |
|---|---|---|
| Navigation | Follow a familiar mapped route and return safely | ☐ |
| Water filtration | Assemble, operate, and clean a portable filter | ☐ |
| Emergency shelter | Set up and break down a basic tarp or bivy shelter | ☐ |
| Fire safety | Prepare an unlit fire lay and review extinguishing procedures | ☐ |
| First aid | Complete a simulated injury assessment and communication exercise | ☐ |
| Emergency signaling | Practice whistle use and identify location-sharing methods | ☐ |
Record What You Learned
After each exercise, answer four questions:
- What worked correctly?
- What was difficult?
- Did any equipment fail or perform unexpectedly?
- What should I improve before practicing again?
You can also record the date, weather conditions, and equipment used.
Over time, this becomes a useful record of your growing outdoor skills.
Repeat the Exercises
Repetition is important.
Try practicing the same activity again after you’ve corrected any problems.
For example, you might repeat your shelter setup until you can assemble it confidently without searching for missing parts.
However, don’t turn practice into a race.
Accuracy, safety, and sound decision-making matter more than speed.
10. When Should Beginners Seek Professional Instruction?
Some survival skills are relatively straightforward to introduce through controlled practice.
Others benefit significantly from qualified instruction.
Consider professional training when you want to develop:
- Advanced map and compass navigation.
- Wilderness first aid and CPR.
- More complicated emergency shelter techniques.
- Safe fire management.
- Wilderness rescue and emergency communication skills.
- Outdoor activities involving difficult terrain or challenging environmental conditions.
Classes may be available through outdoor education organizations, recreation programs, recognized first-aid training providers, and experienced instructors.
Look for instruction appropriate to your skill level, with clear safety standards and qualified supervision.
A good instructor can correct mistakes before they become established habits.
11. Progress From Basic Exercises to More Realistic Scenarios
Once you’re comfortable with these six exercises, you can begin combining skills in a controlled environment.
For example, you might plan a short daytime outing at a familiar park or established recreation area.
During that outing, you could:
- Use a map to follow a designated route.
- Identify a suitable temporary shelter location without disturbing the environment.
- Set up and take down a tarp where permitted.
- Review how you would treat water without drinking untreated water.
- Practice a simulated first-aid assessment.
- Identify how you would communicate your location during an emergency.
You don’t need to simulate an actual survival emergency.
Keep the activity within your experience level and maintain a dependable way to return safely.
Increase Complexity Gradually
As your skills improve, consider introducing one additional challenge at a time.
You might practice navigation on a different maintained trail, assemble a tarp in a new configuration, or rehearse emergency communication with a partner.
Avoid combining unfamiliar terrain, poor weather, inadequate equipment, and limited communication into a single beginner exercise.
Understand the Difference Between Practice and Survival
Controlled exercises allow you to stop, review instructions, and correct mistakes.
Real emergencies may involve fatigue, fear, injury, limited daylight, and environmental hazards.
Practicing foundational skills can improve preparedness, but it cannot eliminate every risk.
Good judgment remains essential.
12. Basic Wilderness Survival Skills Practice Checklist
Use this checklist to organize your first round of training.
Want to take these exercises outside? Download our free Basic Wilderness Survival Skills Practice Checklist (PDF) to track your progress, review safety reminders, and keep your training organized as you work through all six exercises.
Before Practice
- Choose a familiar, appropriate location.
- Check the weather forecast.
- Review local rules and fire restrictions.
- Tell someone your plans if leaving home.
- Bring appropriate water and personal supplies.
- Inspect the equipment for the selected exercise.
- Review safety procedures.
- Have a reliable way to end the exercise.
During Practice
- Follow the planned exercise.
- Work within your experience level.
- Use equipment according to manufacturer instructions.
- Avoid unnecessary environmental damage.
- Stop if conditions become unsafe.
- Note equipment problems or mistakes.
- Focus on correct technique rather than speed.
After Practice
- Inspect and clean equipment.
- Dry and store gear appropriately.
- Restore the practice area.
- Record what you learned.
- Identify improvements.
- Review the related in-depth survival guide.
- Schedule another safe practice session.
Final Thoughts: Survival Knowledge Becomes More Useful Through Practice
Learning basic wilderness survival skills doesn’t require taking unnecessary risks or putting yourself in difficult situations.
It starts with understanding fundamental techniques and practicing them in safe, controlled environments.
Navigation, water treatment, emergency shelter, fire safety, first aid, and signaling are all valuable subjects to study.
But reading about them is only the beginning.
By handling your equipment, following simple exercises, and learning from small mistakes, you begin developing practical familiarity that can support better decisions outdoors.
Start with one exercise.
Practice it carefully.
Review what you learned, correct any problems, and repeat the process.
As your confidence grows, move gradually toward more realistic outdoor activities while maintaining appropriate safety precautions.
The goal isn’t to prove that you can survive an emergency.
The goal is to develop useful skills before an emergency ever happens.
Prepare. Explore. Be Ready.