
Affiliate Disclosure: This post contains affiliate links. If you purchase through these links, Survival Place Blog may earn a commission at no additional cost to you. As an Amazon Associate I earn from qualifying purchases.
A day hike can begin with clear skies, comfortable temperatures, and a familiar trail. A few hours later, the same route may be covered in heavy rain, surrounded by approaching thunderstorms, or difficult to navigate through fog.
Weather does not have to become extreme to create a dangerous situation. A sudden drop in temperature, stronger winds, deteriorating visibility, or an unexpectedly swollen creek can change the decisions a hiker needs to make.
Day hike weather emergencies are often easier to prevent than to manage after conditions deteriorate. Recognizing early warning signs, understanding your route, and knowing when to change plans can make the difference between a safe return and an avoidable emergency.
This guide explains how to prepare for changing weather, recognize dangerous conditions, and make practical decisions when a routine day hike no longer goes according to plan.
1. Why Short Day Hikes Can Become Dangerous
It is easy to underestimate a short hike, particularly when the trail is popular or close to home.
A planned three-hour outing can become much longer when weather changes, someone becomes fatigued, or a section of trail becomes impassable.
Common situations that turn ordinary hikes into emergencies include:
- Sudden thunderstorms developing over mountains or exposed ridgelines.
- Heavy rainfall making trails slippery or stream crossings dangerous.
- Fog or low clouds reducing visibility and obscuring trail junctions.
- Falling temperatures combined with wet clothing and strong wind.
- Excessive heat increasing dehydration and heat-related illness risks.
- Delays that leave hikers returning after sunset.
The problem is rarely just one factor. Poor weather, fatigue, inadequate equipment, and an overly ambitious schedule can combine to create a much more serious situation.
A successful day hike is not measured by whether you reach the summit or complete the planned distance. It is measured by whether you make sound decisions and return safely.
The National Park Service offers additional guidance on planning hikes, preparing for changing conditions, and making safe decisions outdoors in its Hike Smart recommendations.
2. Check Weather Forecasts and Alerts Before Leaving
Weather preparation begins before you reach the trailhead.
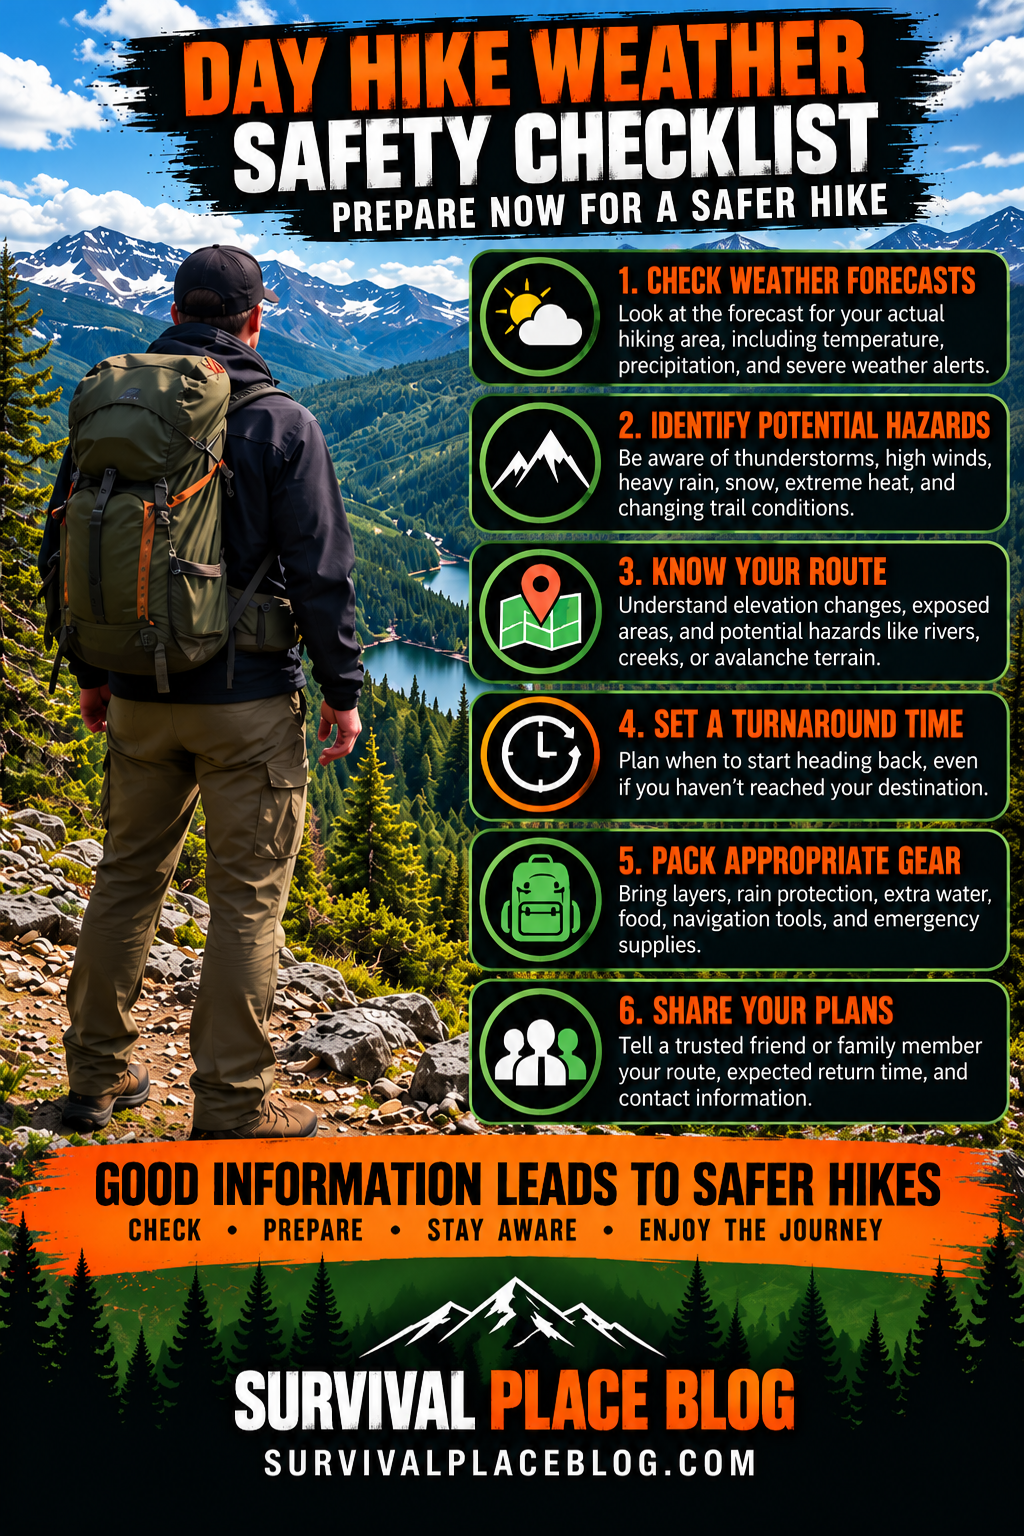
Check the forecast for the actual hiking area, not simply the nearest town. Mountain elevations, coastal terrain, valleys, and exposed ridges can experience conditions very different from nearby communities.
Before leaving, review:
- Expected temperatures throughout the day.
- Probability and timing of precipitation.
- Thunderstorm potential and severe weather alerts.
- Wind speeds and gusts, particularly at higher elevations.
- Snow, freezing conditions, or rapidly changing temperatures.
- Flood warnings, trail closures, and other local hazards.
Pay attention to when conditions are expected to change. A forecast showing afternoon thunderstorms may make an exposed summit route unsuitable even when the morning begins under clear skies.
Before heading out, visit the National Weather Service for current forecasts, weather alerts, and potential hazards affecting your hiking destination.
Build a Weather-Appropriate Day Hiking Kit
Your equipment should reflect the conditions you might reasonably encounter, not just the weather when you leave home.
Useful items include:
- A waterproof or weather-resistant outer layer.
- Insulating clothing appropriate for the season.
- Extra water and food.
- A headlamp with usable batteries.
- A map and compass.
- A first-aid kit.
- Emergency shelter or an emergency bivy.
- A whistle and reliable communication equipment.
A lightweight waterproof rain jacket can help protect against rain and wind, but it should be selected for the expected conditions and carried alongside suitable insulating layers.
The UIQUR Men’s Rain Jacket Raincoat Waterproof Windbreaker is a lightweight, packable option for day hikers who want to carry an extra layer for unexpected rain and wind. Its compact design makes it convenient to keep in a daypack, although hikers should still carry appropriate insulating layers for colder conditions.
Do not rely on a rain jacket alone to prevent cold exposure, especially in windy or near-freezing conditions.
3. Understand Your Route, Elevation, and Expected Return Time
Distance alone does not tell you how demanding a hike will be.
A five-mile route with substantial elevation gain, loose footing, or exposed sections may take considerably longer than a similar distance on a level, maintained trail.
Before starting, identify:
- Total round-trip distance.
- Elevation gain and loss.
- Expected hiking time, including rest stops.
- Exposed ridges, summits, and open terrain.
- Creek crossings and drainage areas.
- Trail junctions and possible navigation difficulties.
- Locations where turning around or returning by a safer established route may be possible.
Remember that a steep downhill section can become a difficult uphill climb on the return trip.
Do Not Depend Entirely on Your Phone
A smartphone can be useful for checking maps and recording your location, but batteries fail, devices break, and cellular coverage is often unreliable in remote areas.
Carry an appropriate map and compass, understand how to use them, and download offline maps when available.
A reliable baseplate compass can provide an important navigation backup when electronic equipment becomes unavailable.
The TurnOnSport Orienteering Compass is a useful backup navigation tool for day hikers. Paired with a suitable map and basic compass skills, it can help you maintain direction when electronic navigation becomes unavailable.
For a more in-depth look at navigating unfamiliar terrain without relying entirely on electronic devices, read our guide, Wilderness Navigation: How to Navigate Without GPS.
4. Establish Turnaround Times and Contingency Plans
One of the simplest ways to prevent a hiking emergency is to establish a turnaround time before starting.
A turnaround time is the latest point at which you will stop progressing toward your destination and begin returning, even if you have not reached your original goal.
For example, suppose you begin a hike at 8:00 a.m. and expect to return by 2:00 p.m.
You might establish 11:00 a.m. as your latest turnaround time, leaving additional time for the return journey and unexpected delays.
However, that time is not a guarantee of safety. Difficult terrain, worsening weather, or slower progress may require turning around much earlier.
Establish Clear Decision Points
Before hiking, decide:
- What time must we begin returning?
- What weather changes will trigger an earlier turnaround?
- Where are the exposed sections of the route?
- Are there established alternative routes, and are they genuinely safer?
- What will we do if a creek crossing becomes impassable?
- Who knows our expected return time?
The key is to make these decisions before fatigue, disappointment, or pressure to reach a destination affects your judgment.
Never allow a planned destination to become more important than the conditions around you.
5. Recognize Changing Clouds, Wind, Visibility, and Temperature
Forecasts provide a starting point, but hikers must continue observing the environment.
Weather conditions can develop faster than expected, especially in mountainous terrain.
Warning Signs Worth Taking Seriously
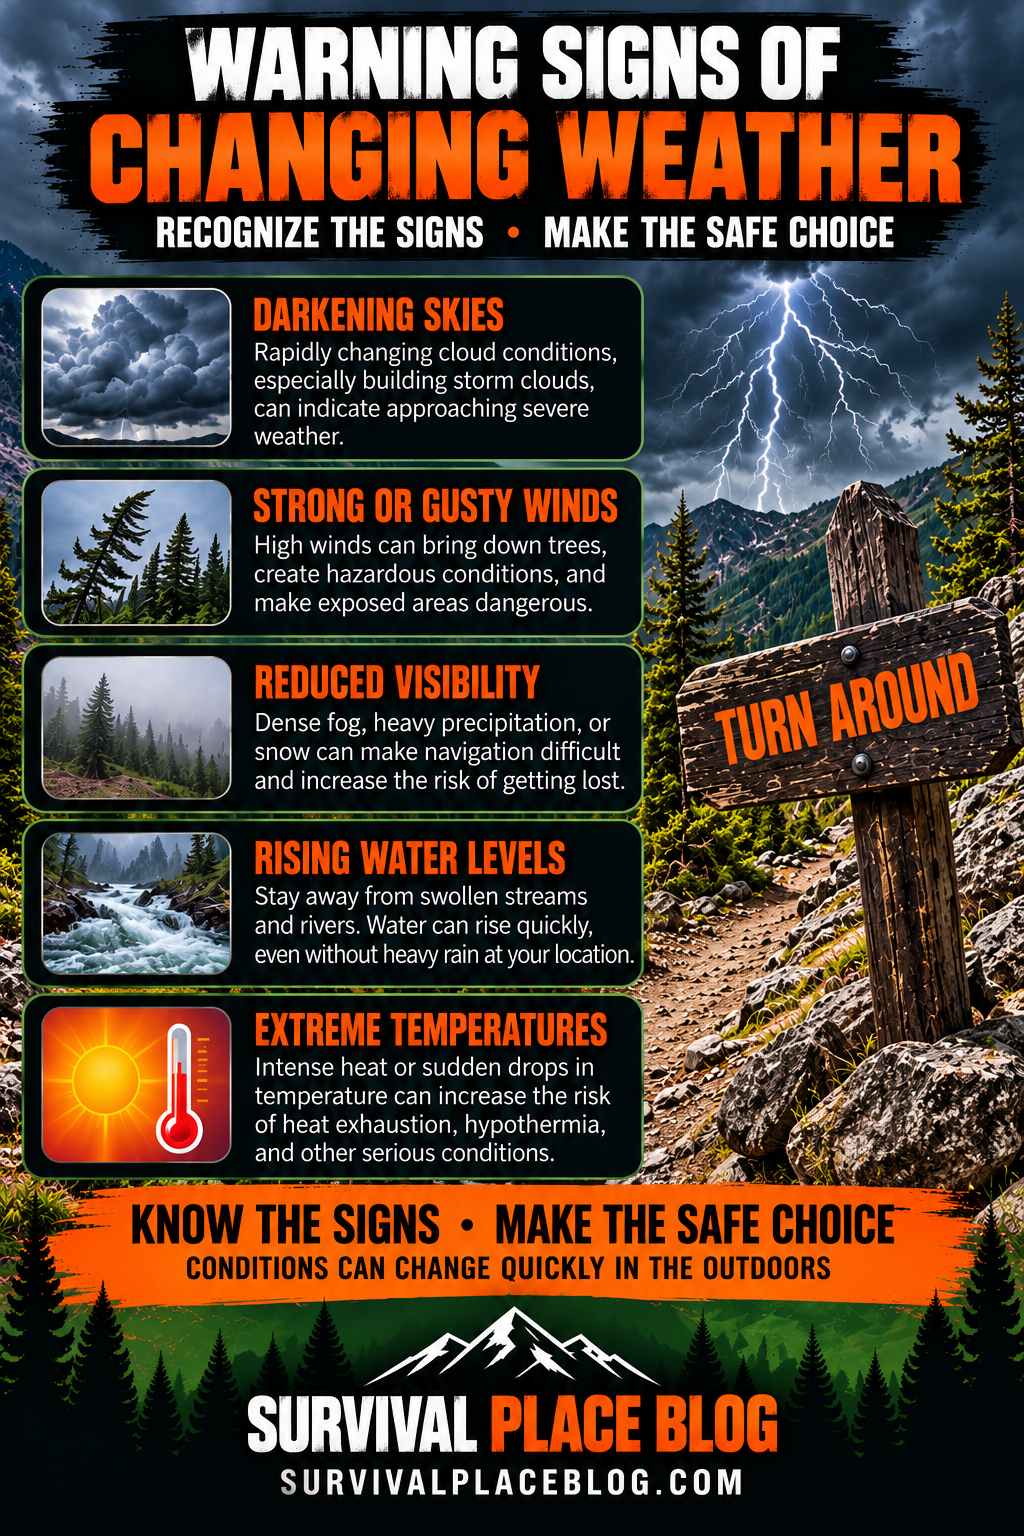
Cloud development: Rapidly growing towering clouds or darkening storm clouds can indicate developing thunderstorms. Cloud appearance alone cannot reliably determine when lightning will begin.
Increasing wind: Stronger gusts, shifting winds, and blowing debris may signal deteriorating conditions or an approaching weather system.
Falling visibility: Fog, low clouds, rain, or blowing snow can make navigation difficult and obscure trail markers.
Temperature changes: A noticeable temperature drop combined with rain and wind can increase cold-exposure risk.
Changing trail conditions: Water flowing across trails, unstable footing, and newly fallen debris may indicate that continuing will become more difficult.
No single observation should replace official weather information. Instead, combine current conditions with your forecast, location, terrain, and remaining distance.
Make Decisions Early
If weather is deteriorating while you are still on a relatively safe section of trail, evaluate whether returning now is safer than continuing toward exposed or difficult terrain.
Waiting until the situation becomes severe can eliminate options that were available earlier.
6. Recognize Thunderstorms and Lightning Danger
Thunderstorms are among the most serious weather threats hikers can encounter.
Lightning can strike outside the area of heavy rainfall, and hikers do not need to be directly underneath a storm to be at risk.
If you hear thunder, lightning is close enough to present a danger.
The National Weather Service emphasizes that there is no safe location outdoors when thunderstorms are in the area.
The National Weather Service provides important lightning safety guidance, including how to recognize thunderstorm danger, find appropriate shelter, and avoid hazardous outdoor locations.
The Best Lightning Plan Starts Before the Storm
When thunderstorms are forecast, consider postponing the hike, selecting a less exposed route, or arranging your schedule so you can reach a substantial building or enclosed, hard-topped vehicle before storms arrive.
If thunderstorms threaten while you are hiking:
- Stop pursuing exposed summits or ridgelines.
- Seek a substantial enclosed building or hard-topped vehicle when reachable.
- Avoid isolated trees, open summits, bodies of water, and exposed high terrain.
- Do not mistake a tarp, tent, picnic shelter, or rock overhang for lightning-safe shelter.
- Avoid routes that introduce additional hazards, such as flooded crossings or dangerous descents.
If no lightning-safe shelter is reachable, there is no completely safe outdoor alternative. Moving away from elevated, isolated, or water-exposed locations may reduce some risks, but it does not eliminate lightning danger.
Do not assume that running through an active storm or crossing dangerous terrain is safer than stopping. Assess the available routes and hazards rather than following a rigid rule.
Once in a lightning-safe location, wait at least 30 minutes after the last thunder before resuming outdoor activities.
7. Recognize Heat Stress, Dehydration, and Cold Exposure
Weather emergencies are not limited to thunderstorms.
High temperatures, direct sunlight, cold rain, and wind can all affect a hiker’s ability to make decisions and travel safely.
Heat Stress and Dehydration
Possible signs of heat-related illness include:
- Heavy sweating.
- Headache or dizziness.
- Weakness and unusual fatigue.
- Nausea.
- Muscle cramps.
- Increased thirst.
Move to a cooler or shaded location, stop exertion, loosen unnecessary clothing, and begin cooling measures.
An alert person who can swallow normally may drink water or an appropriate rehydration beverage.
Confusion, collapse, seizures, or altered mental status can indicate heat stroke, a medical emergency. Call emergency services and begin rapid cooling immediately.
The Centers for Disease Control and Prevention (CDC) provides guidance on recognizing heat-related illnesses, including heat exhaustion and heat stroke, along with recommended actions when symptoms develop.
Carrying sufficient water is essential, but hikers should also account for temperature, exertion, route duration, and individual needs.
The Owala FreeSip Stainless Steel Water Bottle, 24 oz is a practical option for day hikers who prefer a reusable, insulated water bottle. Its 24-ounce capacity and convenient drinking design make it suitable for carrying water on shorter outings. For longer hikes or hot conditions, bring additional water based on your route, expected temperatures, and individual hydration needs.
Cold Exposure and Hypothermia
Cold exposure can occur in relatively mild temperatures when rain, sweat, and wind remove body heat.
Watch for:
- Persistent shivering.
- Loss of coordination.
- Slurred speech.
- Confusion or unusual behavior.
- Increasing exhaustion.
Move out of wind and precipitation where safely possible, replace wet clothing with dry insulation, and protect the person from further heat loss.
Suspected hypothermia requires prompt attention. Severe symptoms or altered consciousness warrant emergency assistance. Handle the person gently and avoid unnecessary exertion.
Do not assume someone is safe simply because the temperature is above freezing.
8. Decide Whether to Turn Back, Reroute, or Seek Safer Shelter
When conditions change, the most important skill may be deciding what not to do.
There are three broad options: turn around, use a genuinely safer established route, or stop in a safer location while arranging assistance or waiting for conditions to improve.
The correct choice depends on the actual hazards.
When Turning Back Makes Sense
Turning around early may be appropriate when:
- Storm clouds are building ahead.
- Visibility is declining.
- Your turnaround time is approaching.
- The trail ahead becomes more exposed.
- Someone in the group is struggling.
- Returning along the known route remains reasonably safe.
When Rerouting May Be Appropriate
An alternate route should only be considered when it is known, navigable, legally accessible, and demonstrably safer.
An unfamiliar shortcut can introduce steep slopes, unstable ground, additional creek crossings, or navigation problems.
Do not assume that a shorter route is safer.
When Stopping May Be Safer
Stopping in a relatively protected location may be preferable when moving would require crossing floodwater, entering dangerously exposed terrain, or navigating an unfamiliar route with inadequate visibility.
However, remaining in a drainage, flood-prone area, or lightning-exposed location can also be dangerous.
The objective is not simply to keep moving or remain stationary. It is to avoid creating a more serious hazard.
Carrying Emergency Shelter
A compact emergency bivy or weather-appropriate emergency shelter can provide additional protection if an unexpected delay leaves you exposed to wind or precipitation.
The S.O.L. Survive Outdoors Longer Emergency Bivvy is a compact emergency shelter option designed to help reduce heat loss and provide protection from wind and rain during an unexpected delay outdoors. It also includes a rescue whistle and tinder cord. While useful as a backup, an emergency bivy does not replace proper insulating clothing or a complete shelter system, and it should never be considered safe shelter from lightning.
Emergency shelters are not lightning-safe structures and cannot replace proper planning.
For additional guidance, see Emergency Outdoor Shelter: How to Choose, Build, and Survive the Night.
9. Respond to Flooded Crossings, Washouts, and Impassable Trails
Heavy rain can change trail conditions rapidly.
A creek that was shallow during the morning may become fast-moving or impassable later in the day. Water levels may rise even when the heaviest rainfall occurs upstream.
The National Weather Service advises people caught outdoors during flooding to seek higher ground and avoid entering floodwater.
The National Weather Service provides important flood safety guidance, including why hikers should avoid entering floodwater and remain alert to rapidly changing conditions near streams, rivers, and low-lying areas.
If a Crossing Becomes Dangerous
- Do not enter moving floodwater.
- Do not assume that a crossing is safe because you crossed it earlier.
- Avoid unstable logs, submerged rocks, and damaged bridges.
- Watch for rapidly rising water, debris, and eroding banks.
- Move away from flood-prone drainages when necessary.
- Reevaluate your route and communication options.
If a trail is blocked by a washout or landslide, do not automatically attempt to climb around it. Loose slopes and unstable edges may be more dangerous than waiting or retracing your route.
If no safe return route remains, communicate your location and situation when possible and consider requesting assistance rather than attempting a hazardous crossing.
10. Communicate Changes in Your Plans
A trip plan is only useful when someone knows what to do if you do not return.
Before leaving, give a trusted person:
- Your intended trailhead.
- Planned route and destination.
- Who is hiking with you.
- Expected return time.
- Vehicle information when appropriate.
- Instructions for contacting authorities if you are overdue.
If weather forces a change in plans, update that person when communication is available.
Understand Communication Limitations
Cellular service may be unreliable in remote areas. A fully charged phone, offline maps, and a backup battery are useful, but they are not guaranteed communication solutions.
A satellite messenger or personal locator beacon can provide an additional emergency communication option, depending on the device, coverage, subscription, and operating conditions.
The Ocean Signal rescueME PLB1 Personal Locator Beacon is a compact emergency signaling device designed to transmit a distress alert to search-and-rescue authorities through the satellite-based rescue system. Unlike many two-way satellite communicators, it does not require a monthly subscription. However, it is intended for genuine emergencies and does not provide routine two-way messaging. Hikers should register their beacon, understand its limitations, and learn the proper activation procedures before heading into remote areas.
Know how to operate your equipment before relying on it.
If you request rescue, provide your location, the nature of the emergency, the number of people involved, and any immediate medical concerns.
Avoid repeatedly changing locations after communicating your position unless remaining there is unsafe or rescuers instruct you otherwise.
11. What to Do When Weather Prevents a Safe Return
Sometimes a hiker makes good decisions and still becomes delayed by conditions outside their control.
A washed-out trail, unexpected injury, severe weather, or rapidly approaching darkness may prevent a safe return.
First, Stabilize the Situation
Stop long enough to evaluate the immediate hazards.
Ask yourself:
- Are we in danger from lightning, flooding, falling trees, or unstable terrain?
- Is anyone injured, exhausted, or showing signs of exposure?
- Do we know our exact location?
- Is a safe route back available?
- Can we communicate with someone?
- Do we have sufficient clothing, water, light, and emergency supplies?
If someone is injured, use your first-aid training, avoid unnecessary movement when serious injury is suspected, and seek emergency help when needed.
If an injury leaves you or someone in your group unable to walk out safely, our guide, Injured on a Wilderness Trail: What to Do When You Can’t Walk Out, explains how to assess the situation, protect the injured person, and coordinate emergency assistance.
Our guide, Wilderness First Aid: Essential Skills for Outdoor Emergencies, explains important skills to learn before heading into remote areas.
For a more detailed look at recognizing injuries, responding to medical emergencies, and preparing for unexpected situations outdoors, read our guide, Wilderness First Aid: Essential Skills for Outdoor Emergencies.
Protect Yourself From Further Exposure
If returning is unsafe, identify a location that minimizes the hazards actually present.
Avoid flood channels, unstable slopes, exposed ridgelines during thunderstorms, and areas beneath damaged or hazardous trees.
Use dry insulating layers, rain protection, and appropriate emergency shelter to reduce heat loss.
If visibility is poor, do not wander without a reliable route or a clear reason to move.
Know When to Request Help
Request emergency assistance when someone has a serious medical condition, you are trapped by hazardous terrain or weather, or you cannot safely return without assistance.
A delay is inconvenient. Attempting a dangerous crossing, exposed traverse, or unplanned descent can turn that delay into a life-threatening situation.
Preparing for an Unplanned Overnight Stay
If you may need to remain outdoors after dark, prioritize immediate safety, protection from exposure, communication, and conserving energy.
For a more detailed look at handling an unexpected night outdoors, read our guide, Stranded Overnight in the Wilderness: What to Do When You Can’t Get Home. It covers deciding when to stop, finding safer shelter, managing exposure, communicating your location, and preparing for daylight or rescue.
12. Real-World Scenario and Pre-Hike Decision Checklist
Scenario: Turning Around Before the Storm
A hiker begins a seven-mile day hike on a cool, clear morning.
The route climbs gradually through forest before reaching an exposed viewpoint several miles from the trailhead.
Before leaving home, the hiker checks the forecast and notices a possibility of afternoon thunderstorms.
Rather than ignoring that possibility, the hiker establishes a turnaround time and packs a rain jacket, warm layer, map, compass, water, first-aid kit, and emergency supplies.
About three miles into the hike, conditions begin changing.
Clouds build over nearby ridges. The wind strengthens, and visibility toward the higher terrain becomes less reliable.
The viewpoint is still ahead, but the hiker recognizes that continuing would increase exposure and reduce the time available for a safe return.
The hiker decides to turn around before thunder begins.
The return takes longer than expected because the trail has become damp and slippery, but the hiker reaches the trailhead without entering the exposed section during the developing storm.
What Made the Difference?
The hiker did not need to demonstrate an advanced survival technique.
Instead, several ordinary decisions prevented a potentially serious situation:
- Checking the forecast.
- Understanding the route.
- Carrying appropriate equipment.
- Establishing a turnaround time.
- Recognizing deteriorating conditions.
- Accepting that reaching the destination was optional.
The most important decision happened before the weather became dangerous.
Practical Pre-Hike Weather Decision Checklist
Use this checklist before every day hike.
Weather and Conditions
- Check the forecast for the actual hiking area and elevation.
- Review weather alerts and local trail closures.
- Identify possible thunderstorms, extreme temperatures, and heavy rainfall.
- Consider whether the planned route is appropriate for the forecast.
Route and Timing
- Review distance, elevation, and expected hiking time.
- Identify exposed terrain and water crossings.
- Establish a realistic turnaround time.
- Identify safe, established alternatives where available.
- Plan for delays and reduced visibility.
Equipment
- Carry suitable rain protection and insulating layers.
- Pack adequate water and food.
- Bring a map, compass, and offline navigation resources.
- Carry a headlamp and first-aid supplies.
- Pack emergency protection appropriate for the environment.
- Check communication equipment and batteries.
Communication
- Leave a trip plan with a trusted person.
- Share the expected return time.
- Understand cellular coverage limitations.
- Know how to request emergency assistance.
During the Hike
- Monitor clouds, wind, temperature, visibility, and trail conditions.
- Reevaluate the route when conditions change.
- Turn around early when continued travel increases risk.
- Never enter floodwater or assume exposed terrain is safe during lightning.
- Seek help rather than attempting a dangerous return.
Take this checklist on your next outdoor adventure! Download our free Day Hike Weather Safety & Decision Checklist (PDF) to review weather conditions, plan your route, establish turnaround times, and make safer decisions when conditions change.
Review Every Hike
After returning, consider what worked and what could be improved.
Did the forecast match actual conditions? Was your turnaround time realistic? Did your clothing and equipment perform as expected?
Even an uneventful hike provides an opportunity to improve your judgment.
Conclusion: The Best Survival Decision May Be Turning Around
Day hike weather emergencies do not always begin with dramatic storms or obvious danger.
Sometimes they begin with a small change in the wind, a developing cloud bank, an unexpectedly slippery trail, or a decision to continue just a little farther.
Learning to recognize these warning signs is an essential part of becoming a safer and more capable hiker.
Check conditions before leaving, understand your route, establish clear decision points, and carry equipment suited to the environment.
Most importantly, remember that changing your plans is not a failure.
The goal of every day hike is not simply to reach the destination. It is to return safely, with the experience and judgment to enjoy the next one.