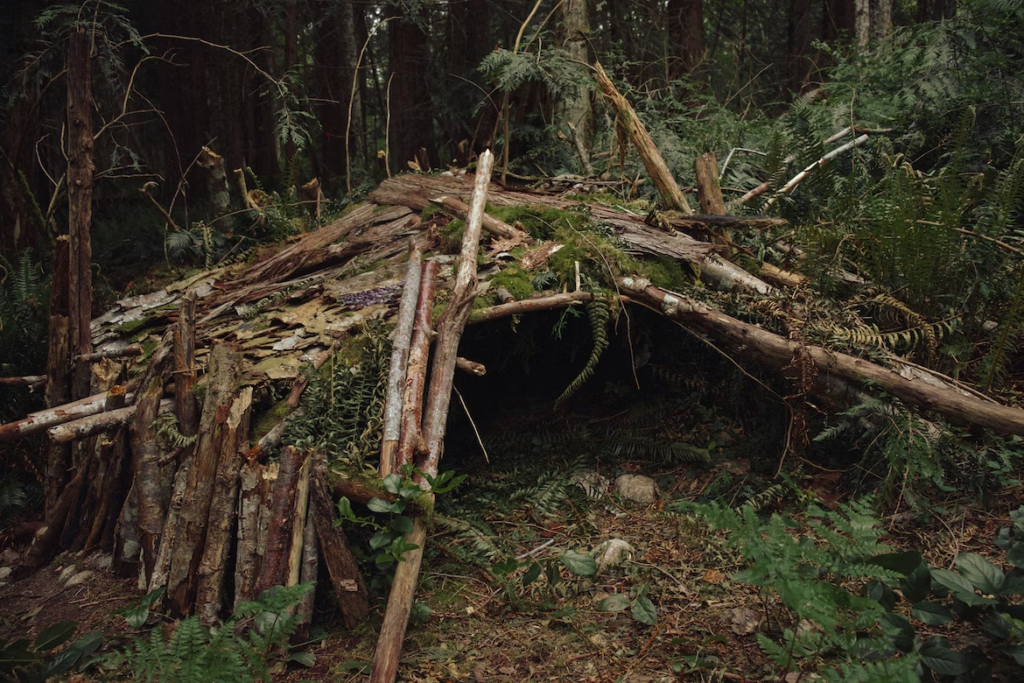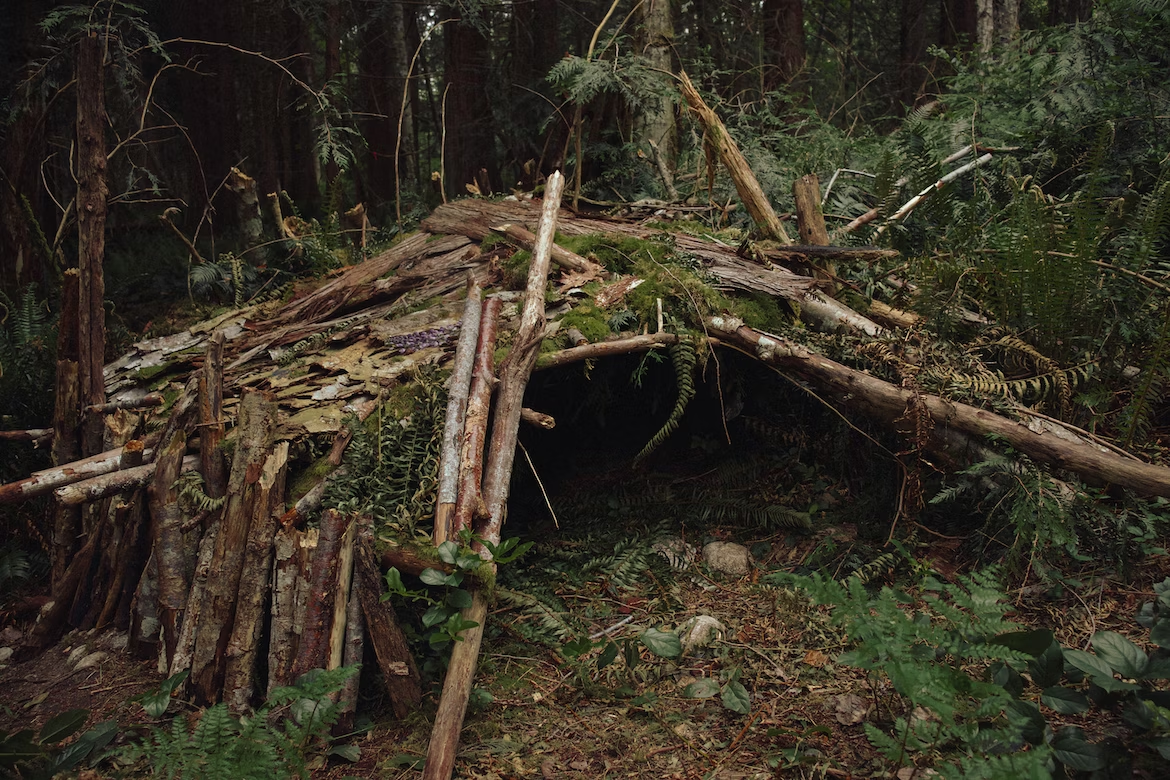
The lean-to shelter is one of the most popular and basic structures that can provide protection against the elements when stranded in the wilderness. Its simplicity, effectiveness, and ease of construction make it a go-to choice for many survival situations. In this detailed guide, we’ll walk you through the step-by-step process of building a lean-to shelter and what factors you should consider during its construction.
1. Why a Lean-To Shelter?
Before diving into the steps, it’s essential to understand why a lean-to shelter is so effective:
- Simplicity: Requires minimal tools and materials.
- Protection: Provides shelter against rain, wind, and sun.
- Heat Conservation: When combined with a fire, it can reflect heat back towards you.
- Speed: Can be constructed relatively quickly.
2. Choosing the Right Location
The location of your shelter plays a critical role in its effectiveness. Here’s what to consider:
- Safety: Stay away from places like cliff edges, loose rocks, and dead trees or branches that might fall.
- Water and Food: Proximity to a water source is essential, but don’t build too close to avoid flooding or unwanted wildlife encounters.
- Sun Exposure: Consider where the sun rises and sets. In cold environments, maximizing sunlight can provide warmth.
- Fire Safety: If you plan to have a fire, ensure it’s at a safe distance and downwind from your shelter.
3. Materials Needed
Essentials:
- Long, Sturdy Branch: This will serve as the main ridgepole of your lean-to.
- Smaller Branches: These are for the sides and frame.
- Leaves, Grass, or Ferns: For insulation and roofing.
Optional but Helpful:
- Rope or Vines: For tying branches together if needed.
- Knife or Sharp Tool: To help shape or shorten branches.
4. Building the Lean-To Shelter: Step by Step
Step 1: Setting up the Ridgepole
- Find a long, sturdy branch to serve as your ridgepole. This will be the main support of your shelter.
- Place one end on the ground and the other against a tree, rock, or mound. The angle it forms with the ground will determine the size of your shelter. A sharper angle provides more ground space but less height, while a wider angle is the opposite.
- Secure it firmly. If you have a rope or vine, tie the ridgepole to the tree. If not, ensure it’s stable using rocks or stakes.
Step 2: Setting up the Frame
- Gather many smaller, sturdy branches.
- Lean them against the ridgepole, spacing them about a hand’s width apart. They should resemble the pages of an open book.
- Make sure they’re secure. If you have extra vines or rope, you can tie the branches to the ridgepole for added stability.
Step 3: Insulating and Roofing
- Start from the bottom and work your way up.
- Place leaves, ferns, or grass on the branches, ensuring they overlap like shingles. This will help channel the water away if it rains.
- For added insulation, especially in colder environments, you can add another layer of branches and another layer of leaves.
- Ensure the insulation is thick enough so that you can’t see the sky when you’re underneath.
Step 4: Ground Insulation
- Clear the ground inside your shelter of sharp objects and debris.
- Lay down a thick layer of dry leaves, grass, or ferns. This will provide insulation against the cold ground and make your shelter more comfortable.
Step 5: Add a Fire Reflector (Optional)
- If in a cold environment, consider building a fire in front of your lean-to.
- Create a wall of logs, stones, or earth opposite your shelter and parallel to your fire. This will reflect heat back towards you, ensuring you stay warm.
5. Additional Considerations
Wind Direction: Always consider the direction of the prevailing wind. Ideally, the back of your lean-to should face the wind, ensuring you are protected.
Size: Your shelter should be just big enough for you to lie down comfortably. A compact shelter retains heat better than a spacious one.
Maintenance: Always inspect your shelter for any areas that might leak or need additional insulation.
6. Enhancements
As time permits or if your stay is prolonged:
- Build Walls: Using the same method as the roofing, you can enclose one or both sides of your lean-to for added protection.
- Add a Door: A simple flap made of bark, a large leaf, or even a piece of clothing can serve as a door to retain heat.
- Elevate the Bed: If flooding might be an issue or for added insulation, create a raised bed using logs and leaves.
7. Conclusion
A lean-to shelter, when built correctly, can provide protection and warmth in survival situations. Its simplicity and the fact that it requires minimal resources make it a valuable skill to master. With practice, you can set up a lean-to quickly and effectively, ensuring you have shelter when you need it most. Always remember: in a survival situation, your knowledge and resourcefulness are just as important as any tool you might have. The more you practice and familiarize yourself with these skills, the better prepared you’ll be.