Affiliate Disclosure: This post contains affiliate links. If you purchase through these links, Survival Place Blog may earn a commission at no additional cost to you. As an Amazon Associate I earn from qualifying purchases.
A home water storage system is one of the most important parts of emergency preparedness.
You can go through a power outage without lights. You can miss a few meals. But safe water is something every household needs every day for drinking, cooking, hygiene and basic sanitation.
A water emergency doesn’t have to mean a dramatic nationwide disaster. A broken water main, severe storm, earthquake, flood, wildfire, extended power outage, contamination event or utility failure can interrupt normal water service with little warning.
That’s why storing water before an emergency is far easier than trying to find safe water after one begins.
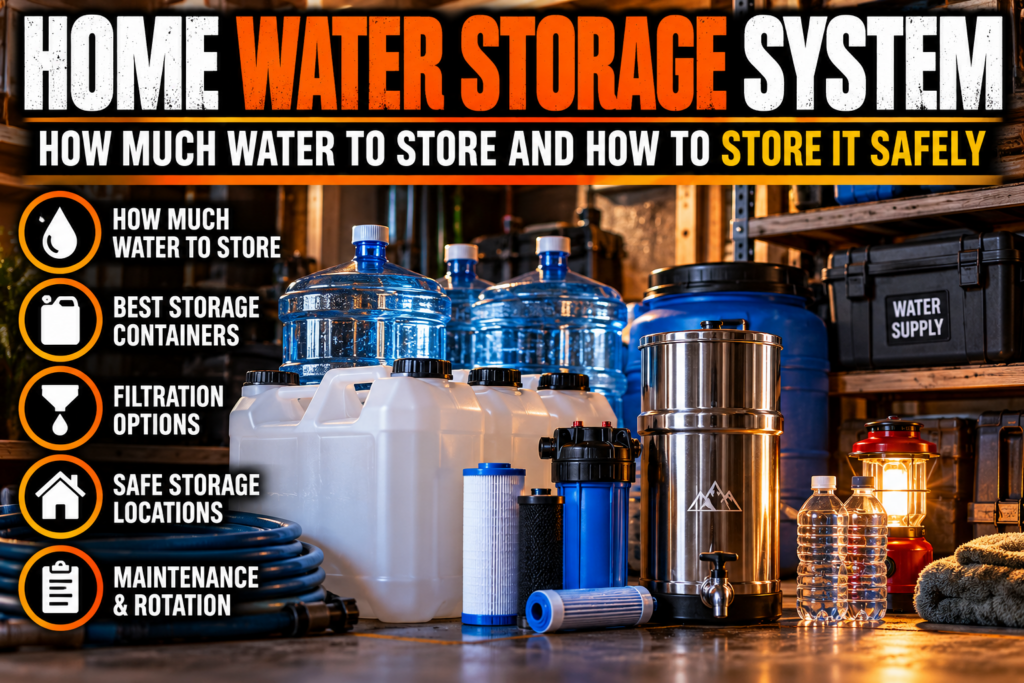
This guide explains how much emergency water to store, which containers work best, how to use larger 55-gallon water barrels, where to keep your supply, when to rotate stored water, how rainwater fits into a preparedness plan and what to do if your stored supply runs low.
How Much Emergency Water Should You Store?
Start with the baseline recommended by public-health emergency guidance.
The CDC recommends storing at least:
1 gallon of water per person per day for at least 3 days.
If possible, CDC recommends trying to store a 2-week supply.
That gallon is intended to cover drinking and other basic uses such as cooking and brushing teeth.
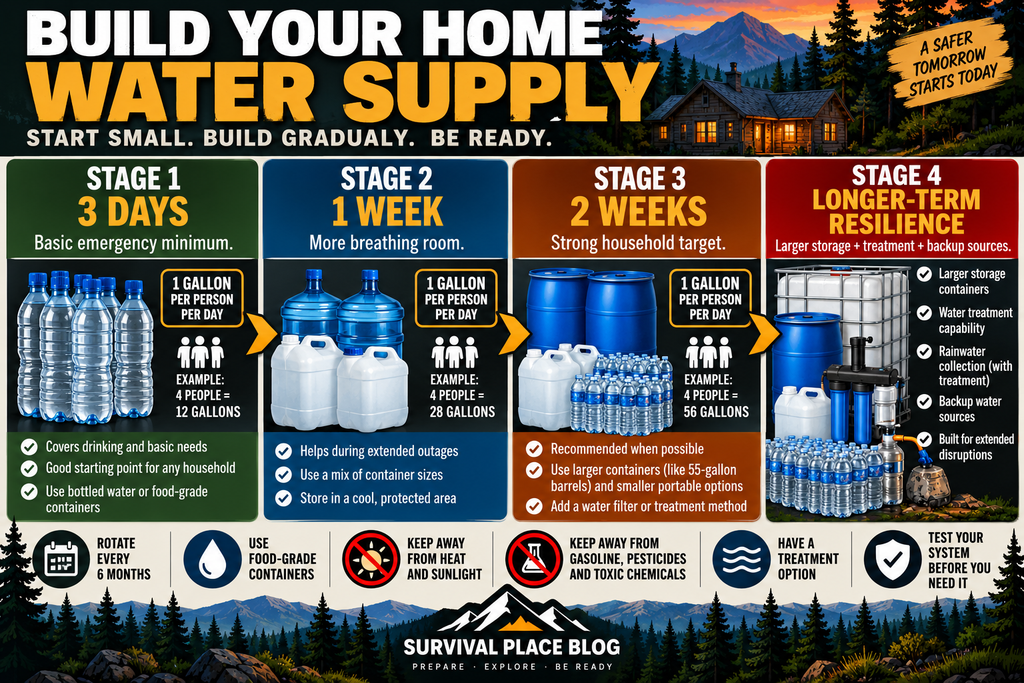
For a family of four, the numbers add up quickly:
- 3 days = 12 gallons
- 7 days = 28 gallons
- 14 days = 56 gallons
- 30 days = 120 gallons
This is why serious household water preparedness usually involves more than a case of bottled water sitting in the garage.
One Gallon Per Person Is a Starting Point, Not a Maximum
Some households should plan for more.
CDC specifically notes that additional water may be necessary for people who are sick, pregnant women, pets and households in hot climates.
Also consider:
- Infants and young children
- Older adults
- Medical needs
- Medications that require water
- Mobility limitations
- Pets
- Hot weather
- Physically demanding activity
- Cooking methods
- Hygiene and sanitation
If someone in your household relies on electrically powered medical equipment or has other specialized emergency needs, incorporate those requirements into the overall household plan.
Don’t build your water supply around the absolute minimum if you have the space and ability to store more.
A Practical Water-Storage Goal
Trying to build a three-month water supply on your first trip to the store can be overwhelming.
Build in stages.
A practical progression is:
Stage 1: Three days
Meet the basic emergency recommendation first.
Stage 2: One week
This gives your household considerably more breathing room during an extended utility outage.
Stage 3: Two weeks
This is an excellent goal for many households and aligns with CDC’s recommendation to try to store a two-week supply when possible.
Stage 4: Longer-term resilience
Once you’ve established two weeks of safe drinking water, you can consider larger containers, additional treatment capability and secondary water sources.
Commercially Bottled Water vs. Water You Store Yourself
There are two straightforward ways to build an emergency water supply.
Commercially Bottled Water
CDC describes unopened commercially bottled water as the safest and most reliable emergency water source.
It’s convenient because there’s no container preparation involved.
Check the manufacturer’s date information, keep the bottles protected from excessive heat and sunlight, and rotate them through normal household use.
The downside is space. Individual bottles and cases become cumbersome as your supply grows.
Home-Filled Water Containers
Larger reusable containers are usually more practical when you want to store dozens of gallons.
CDC recommends using food-grade water-storage containers when filling your own supply.
That includes containers specifically manufactured and sold for potable-water storage.
Choosing Containers for a Home Water Storage System
The container matters.
Use containers designed for storing drinking water rather than assuming any plastic barrel, bucket or jug is suitable.
Good emergency water containers should be:
- Food grade
- Durable
- Tightly sealable
- Made from materials intended for potable-water storage
- Easy to clean and fill
- Practical to dispense from
Never use a container that previously held toxic chemicals.
Even if a used drum looks clean, residues from its previous contents may make it inappropriate for drinking-water storage.
When in doubt, buy a container specifically manufactured for potable water.
Small Containers vs. Large Containers
There isn’t one perfect water container for every household.
A combination often works best.
Small Bottles
Advantages:
- Easy to carry
- Easy to distribute
- Convenient for vehicles and evacuation
- No pump required
Disadvantages:
- More packaging
- Less space-efficient
- Large supplies become bulky
5- to 7-Gallon Water Containers
These are a useful middle ground.
They hold enough water to matter without becoming completely immovable.
Remember that water weighs roughly 8.34 pounds per gallon.
A 5-gallon container therefore contains about 42 pounds of water, before adding the weight of the container itself.
A 7-gallon container contains roughly 58 pounds of water.
Make sure the people expected to use the containers can actually move them.
55-Gallon Water Barrels
A 55-gallon barrel can provide a substantial household reserve, but it introduces a different issue:
Weight.
Fifty-five gallons of water weighs roughly 459 pounds, before the barrel itself is included.
Once filled, that barrel isn’t going anywhere without specialized equipment.
That means you need to decide where it will live before filling it.
Setting Up a 55-Gallon Water Barrel
Large barrels can be extremely useful for households with adequate storage space.
But plan the installation instead of simply filling a barrel wherever it happens to be sitting.
Choose a Potable-Water Barrel
Buy a barrel manufactured for potable-water storage.
Don’t gamble on a mystery used drum just because it’s inexpensive.
Pick the Location First
A filled barrel is effectively stationary.
Choose a location that is:
- Structurally capable of supporting the weight
- Protected from direct sunlight
- Away from gasoline, pesticides and other toxic materials
- Protected from physical damage
- Accessible during an emergency
- Appropriate for the temperature conditions in your area
CDC recommends keeping home-stored water in a cool location—approximately 50°F to 70°F when possible—away from direct sunlight and toxic substances.
Think About How You’ll Get the Water Out
A 55-gallon barrel isn’t useful if your only plan is to tip it over.
You’ll normally want a compatible:
- Hand pump
- Siphon
- Spigot
- Dispensing hose
Whatever touches your drinking water should be clean and appropriate for potable-water use.
Don’t Store Water Directly Beside Chemicals
This deserves its own warning.
CDC recommends keeping emergency water away from toxic substances such as gasoline and pesticides.
That means the corner of a garage beside gasoline cans, solvents, paint, herbicides and pesticides is not an ideal location for your drinking-water reserve.
Choose the cleanest practical storage environment available.
How to Prepare Containers for Water Storage
If you’re filling reusable containers yourself, cleanliness matters.
Follow the container manufacturer’s instructions and current public-health guidance for cleaning and sanitizing containers before filling.
CDC provides specific steps for preparing water-storage containers and recommends letting sanitized containers air-dry before filling them with clean water.
Don’t touch the inside of the container, lid or dispensing surfaces unnecessarily after they’ve been cleaned.
Filling Your Water Containers
If your municipal tap water is currently safe to drink, it provides a convenient source for filling properly prepared emergency containers.
Use clean equipment.
For larger barrels, a hose manufactured for potable drinking water is preferable to an unknown garden hose that may introduce unwanted tastes or contaminants.
Fill according to the container manufacturer’s directions and seal the container tightly.
Then label it.
At minimum, write:
DRINKING WATER
and the:
DATE FILLED
CDC specifically recommends labeling home-filled containers as drinking water and including the storage date.
How Often Should Stored Water Be Rotated?
For water you’ve filled into containers yourself, CDC recommends replacing it every six months.
That’s a much better rule for this guide than vague claims that treated water can simply sit indefinitely.
An easy system is to put a reminder on your calendar twice a year.
When rotation day arrives:
- Inspect the container.
- Use the old water where appropriate.
- Clean and sanitize the container according to current guidance.
- Refill it.
- Mark the new date.
For commercially bottled water, follow the manufacturer’s date information.
How to Dispense Stored Water Without Contaminating It
A clean water supply can become contaminated through poor handling.
CDC recommends using a clean scoop or dispensing device and avoiding contact between hands and the stored water or inside surfaces of the container.
For large containers, a dedicated pump or spigot reduces unnecessary opening and handling.
Teach everyone in the household how the system works before an emergency.
That’s especially important if the person who originally set up the system isn’t home when water service fails.
Don’t Forget Water for Pets
Pets need emergency water too.
Their requirements vary by species, size, diet, activity and environmental conditions.
Don’t assume the human one-gallon calculation somehow includes them.
Store a separate allowance for pets and keep collapsible or lightweight bowls with evacuation supplies.
What About Water for Hygiene and Sanitation?
Not every gallon of emergency water necessarily has to be premium bottled drinking water.
Drinking, cooking, brushing teeth and other ingestion-related uses require safe potable water.
Separate supplies may potentially be used for flushing toilets, cleaning or other non-potable purposes, depending on the emergency and contamination involved.
Keeping potable and non-potable supplies clearly separated prevents mistakes.
Label containers accordingly.
Never assume water that is suitable for toilet flushing or outdoor cleaning is safe to drink.
Rainwater Can Be Useful—but It Isn’t Automatically Drinking Water
The original version of this article described rainwater as essentially pure and chemical-free.
That’s not a safe assumption.
CDC warns that rainwater can pick up germs and chemicals from the air and from roofs, gutters, piping and storage materials. Bird droppings and other debris on a roof can also contaminate collected water.
Rainwater can still be an excellent preparedness resource.
But how you use it should depend on its quality and how it has been collected, stored, tested and treated.
Basic Rainwater-Harvesting Components
A household rainwater system may include:
- Roof or other catchment surface
- Gutters
- Downspouts
- Debris screens
- First-flush diverter
- Storage barrel or tank
- Overflow system
- Dispensing connection
A first-flush diverter directs the initial runoff from a storm away from the storage tank. That first water can carry a higher concentration of dirt, germs and chemicals washed from the catchment surface.
CDC recommends considering a first-flush diverter as one way to improve collected rainwater quality.
Screens can also help keep debris and insects out of the system.
Can You Drink Stored Rainwater?
Don’t assume you can.
CDC recommends using public-system tap water or bottled water rather than rainwater for drinking, cooking, brushing teeth and similar uses when possible.
If rainwater is used for drinking, cooking or bathing, CDC recommends testing it regularly for germs and chemicals and selecting treatment appropriate to the contaminants present.
That last part matters.
A treatment method that removes bacteria may not remove a particular chemical contaminant.
And a filter designed to improve taste isn’t necessarily a microbiological purifier.
Rainwater intended for potable use deserves a more carefully designed treatment and testing plan than a simple garden rain barrel.
Also check local rules before installing a collection system. Regulations and building requirements can vary by location.
Don’t Mix Untreated Rainwater Into Your Drinking-Water Plumbing
CDC warns that rainwater should be kept from entering piping that carries treated drinking water because it can contaminate that supply.
If you’re planning a permanent system connected to household plumbing, this is no longer just a matter of putting a barrel under a downspout.
Use appropriate backflow protection and comply with local plumbing and health requirements.
Water Filters: Know What Yours Actually Removes
An emergency water filter can be an excellent preparedness tool.
But the word filter doesn’t tell you enough.
Different products are designed to reduce different contaminants.
Depending on the technology and certification, a product might address some combination of:
- Sediment
- Protozoa
- Bacteria
- Certain chemicals
- Taste and odor
Some filters do not reliably remove viruses. Others are not designed to remove dissolved chemicals or heavy metals.
Read the manufacturer’s specifications and understand what the particular system is designed and certified to reduce.
Don’t tell yourself that cloudy or questionable water is safe simply because it passed through a filter.
When Stored Water Runs Low
Your first choice during an emergency should generally be water that was safely stored before the event.
If that’s unavailable, follow instructions from local authorities about acceptable water sources and treatment.
Potential emergency sources depend heavily on the type of disaster.
A flood, chemical spill, wildfire or sewage contamination event creates very different water concerns from a simple water-main break.
This is why there’s no universal instruction to “find a stream and filter it.”
The contamination risk matters.
Boiling Water During an Emergency
When authorities recommend boiling because microbiological contamination is a concern, EPA says to bring water to a rolling boil for at least one minute.
At elevations above 5,000 feet (1,000 meters), EPA recommends boiling for three minutes.
If the water is cloudy, EPA advises letting it settle and filtering it through a clean cloth, paper towel or coffee filter before boiling.
Let boiled water cool naturally and keep it in clean, covered containers.
Boiling Does Not Remove Chemical Contamination
This is one of the most important distinctions in emergency water preparedness.
Boiling is excellent for killing disease-causing microorganisms.
It does not make every contaminated water source safe.
EPA specifically warns that boiling or disinfection will not remove contaminants such as heavy metals, salts and most other chemicals.
So if officials issue a Do Not Drink or Do Not Use advisory because of chemical contamination, don’t automatically boil the water and assume you’ve solved the problem.
Follow the specific instructions issued for that event.
Chemical Disinfection With Household Bleach
EPA provides emergency instructions for disinfecting water with household chlorine bleach when boiling isn’t possible.
However, the amount depends on the bleach concentration, and formulations can vary.
Rather than permanently embedding one dosage into a preparedness article and hoping the reader has exactly the right bleach years from now, keep current EPA instructions with your emergency supplies.
EPA’s current guidance specifies regular unscented chlorine bleach suitable for disinfection and provides dosage tables based on sodium-hypochlorite concentration.
Never use scented bleach, color-safe bleach or products containing additional cleaners for drinking-water disinfection.
Water Purification Tablets
Commercial water-treatment tablets can be useful in emergency kits and while traveling.
But, as with filters, read the product instructions and understand what organisms the treatment is designed to address.
Keep treatment products in their original packaging and monitor expiration dates where applicable.
A treatment product is a backup tool—not a reason to skip storing safe water ahead of time.
What About Bathtub Water?
A bathtub can hold a significant amount of water, but an ordinary bathtub is not automatically a sanitary drinking-water container.
Residue from cleaners, soap, personal-care products and the tub itself can contaminate the water.
If you want the bathtub to serve as an emergency reservoir, consider a purpose-designed potable-water bathtub liner intended for emergency storage and follow its instructions.
What I Use: I keep an emergency bathtub water-storage bladder on hand. It stores flat when not needed and can be deployed quickly if an emergency is developing while the tap water is still safe and running. That gives me a way to store a large amount of additional water without permanently dedicating space to another large tank or barrel.
Otherwise, think of ordinary bathtub water primarily as potential non-potable utility water rather than your main drinking supply.
What About Your Water Heater?
Depending on the emergency and the condition of the household plumbing, a conventional tank-style water heater may contain a substantial amount of water.
But don’t automatically drain it during every outage.
Follow utility and emergency instructions, particularly if there is a possibility that the public water supply has been contaminated.
Know how your specific water heater works before an emergency and consult the manufacturer’s instructions for safe shutdown, isolation and draining procedures.
Never work around gas or electrical equipment unless you understand how to do so safely.
Wells During Power Outages
A private well may contain perfectly good groundwater while still leaving you without usable household water.
Why?
The pump generally needs electricity.
If your emergency plan depends on a private well, consider how you’ll operate the pump during an outage and whether your backup-power equipment is actually compatible with the well system.
After flooding or suspected contamination, private wells may require testing and disinfection before the water is considered safe.
Don’t Wait Until the Emergency to Test Your System
A water-storage system is equipment.
Equipment should be tested.
Before you need it:
- Fill and inspect your containers.
- Check for leaks.
- Practice using the pump or spigot.
- Make sure you can access the containers.
- Verify that household members know where everything is.
- Check your filter and replacement components.
- Review water-treatment instructions.
- Make sure stored supplies haven’t expired.
- Confirm your rotation dates.
Finding out that your barrel pump doesn’t fit during Day 3 of a water outage is avoidable.
Home Water Storage System Checklist
Water Quantity
- At least 1 gallon per person per day
- Minimum 3-day supply
- Work toward a 2-week supply when possible
- Additional water for pets
- Additional water for medical or special needs
- Extra allowance for hot climates and heavy activity
Containers
- Commercial bottled water and/or food-grade storage containers
- Tight-fitting lids
- Clearly labeled drinking-water containers
- Fill dates marked
- Containers sized so household members can use them
Large-Barrel Equipment
- Potable-water-rated barrel
- Stable storage location selected before filling
- Compatible hand pump, siphon or spigot
- Clean filling equipment
- Potable-water hose if needed
Storage Location
- Cool when possible
- Away from direct sunlight
- Away from gasoline, pesticides and toxic chemicals
- Protected from damage
- Accessible during an emergency
Treatment and Backup
- Appropriate emergency water filter
- Current EPA water-disinfection instructions
- Appropriate water-treatment supplies
- Pot for boiling water
- Fuel or safe cooking method for boiling during an outage
Rotation and Maintenance
- Home-filled water replaced every six months
- Commercial water dates checked
- Containers inspected
- Pumps/spigots tested
- Filters and treatment supplies checked
- Household members know how to use the system
A Two-Week Water Supply Is More Achievable Than It Sounds
Consider a family of four.
The basic two-week calculation is:
4 people × 14 days × 1 gallon = 56 gallons
That happens to be roughly the capacity of one large water barrel.
But you don’t necessarily need to put all 56 gallons into one barrel.
A more flexible system might combine:
- Commercial bottled water
- Several portable 5- or 7-gallon containers
- One larger stationary container
- A water-treatment backup
That gives you drinking water that’s easy to grab, portable containers if you need to leave, and a larger reserve at home.
Redundancy is often more useful than putting the entire supply into one container.
Water Storage for Apartments and Small Homes
You don’t need a basement or garage to build an emergency water supply.
If space is limited, distribute smaller containers throughout appropriate storage areas.
Possible locations include:
- Bottom of a pantry
- Interior closet floor
- Under sturdy shelving
- Other cool, protected spaces
Be mindful of weight.
Water gets heavy quickly, so don’t overload shelves or place large quantities where a leak could cause serious damage.
Build gradually if that’s what your space requires.
Twelve safely stored gallons are better than an elaborate 100-gallon plan you never actually implement.
Water Storage for Evacuation
Your home water supply and evacuation water supply serve different purposes.
You aren’t going to carry a 55-gallon barrel out the door.
Keep smaller water containers available for evacuation and vehicle use.
If your emergency plan involves traveling on foot, water weight becomes a major limitation. That’s where a reliable treatment method becomes especially important—but it still doesn’t guarantee that every water source you encounter will be chemically safe.
Common Home Water Storage Mistakes
Storing Too Little
A single case of bottled water disappears quickly when it’s being used for drinking, cooking and hygiene.
Calculate your household requirement instead of guessing.
Buying a 55-Gallon Barrel Without Planning Where It Goes
Once filled, it weighs around 459 pounds in water alone.
Position first. Fill second.
Using Unknown Containers
Don’t store drinking water in containers that previously held toxic substances.
Storing Water Beside Gasoline or Pesticides
Keep emergency drinking water away from toxic materials and potential sources of contamination.
Forgetting Rotation Dates
For home-filled water, use a six-month replacement schedule based on current CDC guidance.
Assuming Clear Water Is Safe Water
Dangerous microorganisms and chemicals aren’t necessarily visible.
Assuming Every Filter Removes Everything
Filters have specific capabilities. Know yours.
Assuming Boiling Fixes Chemical Contamination
It doesn’t. Boiling and ordinary disinfection do not remove heavy metals, salts and most other chemicals.
Treating Rainwater as Automatically Potable
Rainwater can pick up both germs and chemicals before it reaches the storage tank.
Having Water but No Way to Dispense It
Test pumps, siphons and spigots before an emergency.
Build the System Before You Need It
A good home water storage system doesn’t have to be complicated.
Start with enough safe drinking water for three days.
Then build toward one week.
Then two weeks.
Add larger storage only when you have an appropriate place for it. Add filtration and treatment as backups rather than substitutes for safely stored water. If rainwater is part of your plan, understand that collection and potability are two different issues.
Most importantly, make the system something your household can actually use.
Label it.
Rotate it.
Test the equipment.
Make sure everyone knows where the water is and how to dispense it without contaminating the supply.
Final Thoughts
Water preparedness isn’t about predicting exactly which disaster will happen.
It’s about recognizing that normal water service can fail—and making sure your family isn’t immediately dependent on empty store shelves when it does.
A few cases of bottled water may cover the first days. Food-grade portable containers can extend that supply. A properly positioned 55-gallon barrel can provide a substantial reserve. Filtration, disinfection knowledge and carefully managed rainwater can add additional layers of resilience.
You don’t need to build the entire system today.
Start with the three-day minimum.
Then improve it until your household has a practical, tested water plan that can handle a longer disruption.
Because when the tap stops working, the best emergency water is usually the safe water you stored before you needed it.